Simplify WordPress Image Optimization Using the Image CDN Plugin
Deploying ImageEngine is made more accessible by using ImageEngine’s Image CDN plugin. The ImageEngine Image CDN plugin gives WordPress users control over using a CDN and directs traffic to ImageEngine after you insert the ImageEngine Delivery Address,
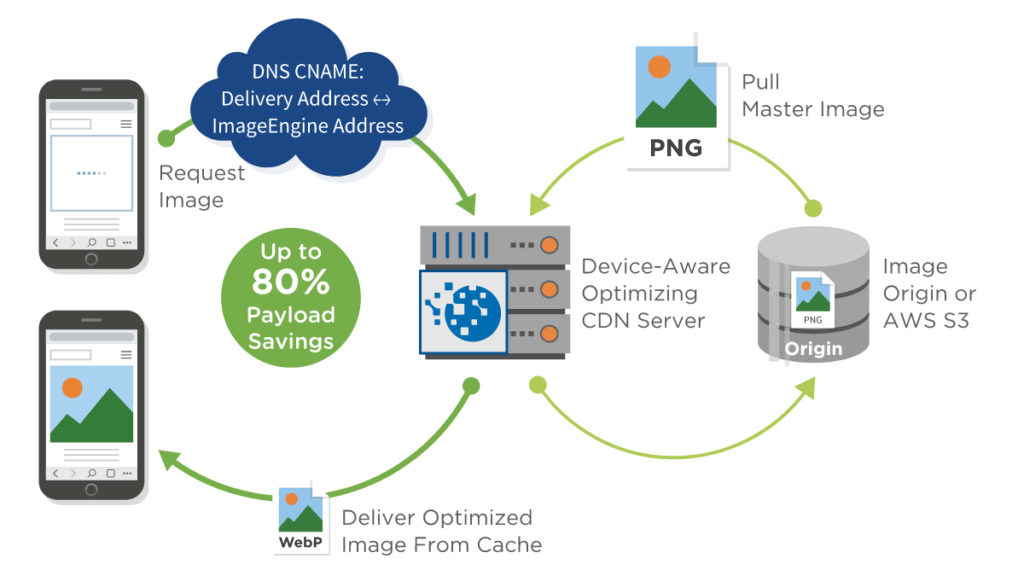
Once installed and configured as shown below, ImageEngine can dynamically pull the original images in WordPress and optimize the images for specific device models. This arrangement reduces image payload by up to 80% and dramatically improves page load time.
- Sign up for an ImageEngine Account
You can unlock a free trial by clicking here.
- Input your Delivery Address URL to the Plugin
When you sign up for a trial account, you will receive your Delivery Address at the end of the account creation. It should look like aabbcc.cdn.imgeng.in.
The settings for the ImageEngine Image CDN plug-in should look like this:
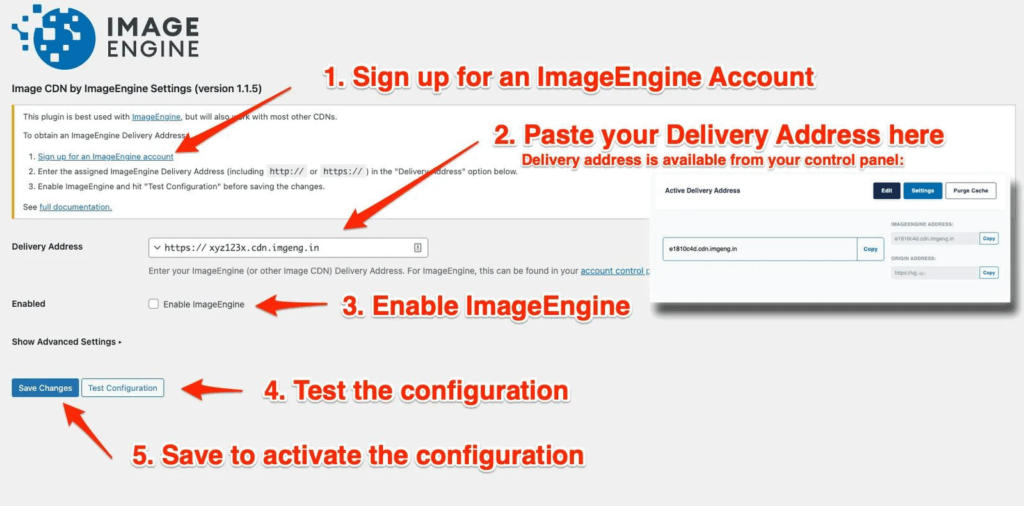
Paste your ImageEngine Delivery Address into the box provided.
- Check the box to enable ImageEngine
- Test the Configuration
Ensure the “enabled” checkbox is marked, and click the “Test Configuration” button. This will verify that the provided delivery address can serve images using the origin and the supplied delivery address. If the test failed, please verify your delivery address, then check your engine settings within your ImageEngine account.
- Save the settings!
Click “Save Changes” to verify that your site serves images through the delivery address. You can do this by “view source” or “inspect element” and confirming that the IMG elements have an SRC attribute referencing the delivery address.
That’s all. If you have any issues or questions, please do not hesitate to contact our customer support.