Getting Started with ImageEngine and React
In this article we discuss the approach to getting started with ImageEngine in React.
React is an open source library built by Facebook for building user interfaces in a declarative approach. ImageEngine is an image CDN that helps accelerate the performance of your website with their plug-in toolsets.
This article explores the easiest technique to get started with the integration of ImageEngine in React. This is a React beginner friendly article, but in case you’re completely new to React, you can brush up the basics from their documentation and those are enough for implementing the code discussed here. We will walkthrough the following topics:
- ImageEngine Component vs HTML Image Tag
- Installing ReactEngine NPM Library
- Implementation and Demo
In case you’re already familiar with the ImageEngine, feel free to skip to the implementation details in section 2 and 3.
ImageEngine Component vs HTML Image Element
React natively does not provide any image component so the common approach is to use the native image element within JSX as follows:
<img src="/images/bike.jpg" alt="Bike" />This works well, until you realise you would need various customizations to the images, such as changing the image format to the modern optimized image format like WebP or AVIF. The series of steps to do this is:
- Convert all images throughout the website to the given new format.
- Compress the new images.
- Upload the new images to the desired storage such as S3.
- Refactor the code at all instances of image tags and change into the new particular format.
After all this effort, what about other customizations that are instance specific, like on the homepage hero image the requirements are to rotate the image by 20 degrees, the footer image might need to be stretched, or the image width might need some alterations etc. All of this is time consuming and exerting and should be actually fixed with options in a custom Image Component itself.
Let’s take a look at how to get this done in the ImageEngine Image Component.
<Image
    src={`/images/bike.jpg`}
    alt="Bike"
    directives={{
      width: 200,
      rotate: 20,
      outputFormat: 'webp'
    }}
/>
This is it, all the manual and laborious steps can be avoided by simply toggling the directives options such as setting width, rotate and even output format. This is how capable ImageEngine can make our native HTML Image Tag.
Demo and Implementation

Demo Application
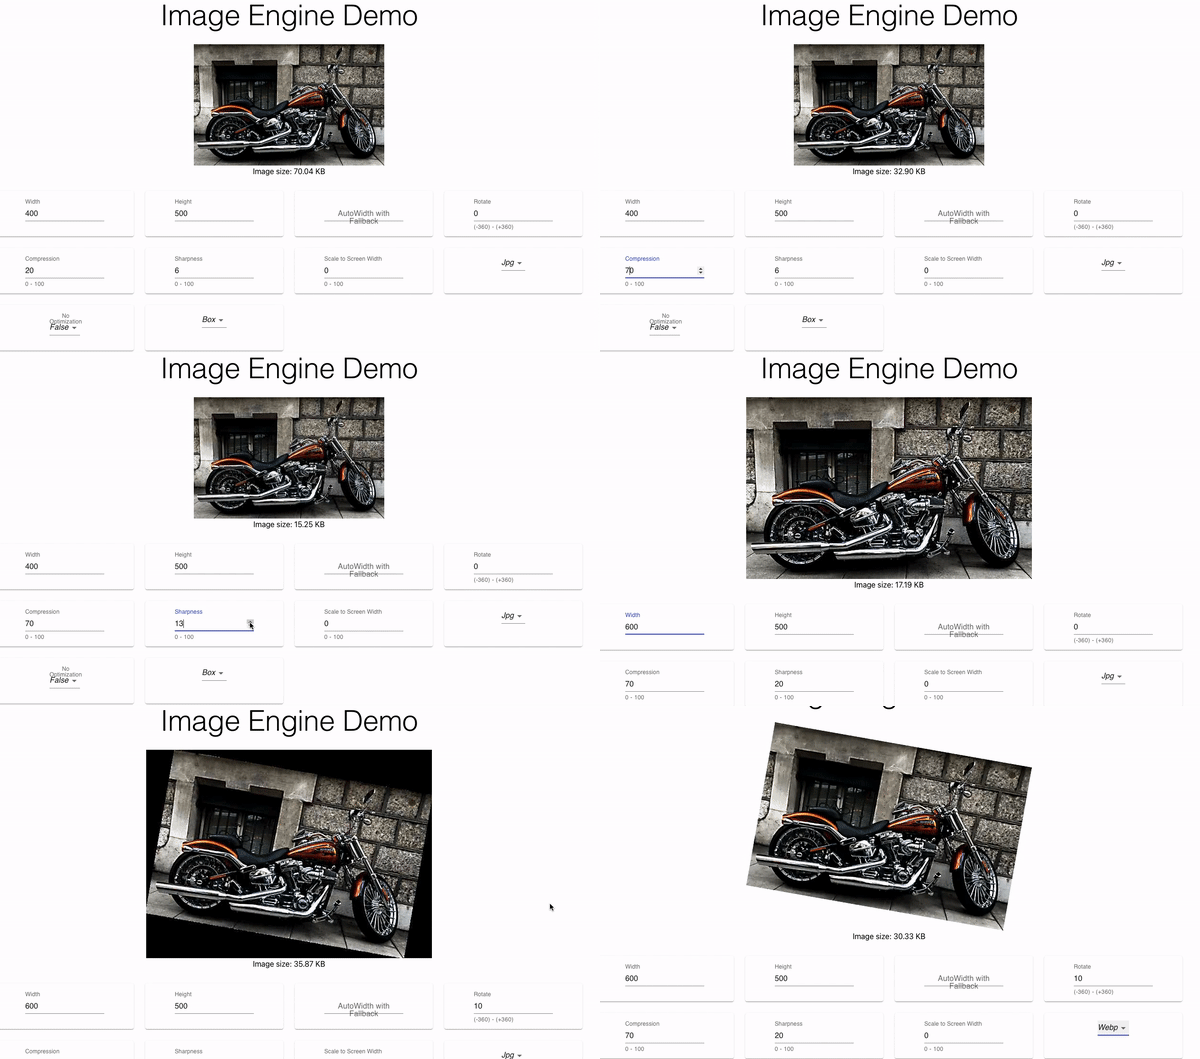
To play around with ImageEngine’s demo, you can head over to the website and toggle around with various options available with ImageEngine’s components. Please note, these are not the only available options. You can get the gist of how easy it is to generate images of various specifications without the need for any manual efforts of uploading, compressing, resizing, renaming in the code, purging the cache etc.

While you play around with various options in the browser, you can even open the Network Tab in the Dev Tools of your browser to find out the images being generated in real-time according to the attributes assigned to the image tag with various options for compression, size, sharpness etc.
Implementation
Now that you’re convinced of the power of ImageEngine, let’s get started with the ImageEngine Node library installation and setup.
Firstly, signup at ImageEngine.io if you haven’t already and go to the dashboard to get your delivery address. Note: For quick start the ImageEngine Guide is self-explanatory and sufficient, the team also provides a video demo for further speedy start.
Next we move on to the code.
Install the library using the npm install command in the terminal in the root folder of the project. save option is added to be saved as a dependency for the project.
npm i @imageengine/react --saveA bonus for ImageEngine’s library is that it natively supports TypeScript, giving a smooth integration with the typescript react projects as well.
The next step is adding a provider to the root component in the React project. Generally, this is the App.tsx or App.jsx file.
First, import the ImageEngineProvider:
import { ImageEngineProvider } from "@imageengine/react"Second, add the image provider to the root component with your specific delivery address like:
https://gecvpk4e.cdn.imgeng.inThis is the host that serves the images from ImageEngine.
<ImageEngineProvider deliveryAddress="YOUR IMAGE DELIVER ADDRESS">
     <div className="App">
     </div>
</ImageEngineProvider>
Finally, import the image component from ImageEngine and replace the image element with this:
import { Image } from "@imageengine/react";